Adding subtitles to video is one of the simplest ways to make your content easier to watch. Many people scroll with the sound off, so subtitles help them follow along right away. They also make videos easier to understand when the speaker has an accent, the audio is not very clear, or the topic is complex. For interviews, classes, and meetings, subtitles can also help you review and organize what was said later. The best method depends on what you need. Some people want the fastest option, some want to keep private files on their own Mac, some want to edit every line by hand, and some would rather pay someone else to do it. In this guide, we will cover 5 practical ways to add subtitles to video, from AI tools and online editors to manual editing and freelancer help.

Quick Answer: 5 Ways to Add Subtitles to Video
You can add subtitles to video in a few different ways, and each one fits a different need. Some people want the fastest AI option. Some want to edit subtitles in a browser. Others prefer to keep local files private, handle everything by hand, or pay someone else to do it. Here are 5 simple ways to choose from:
- Add subtitles to video automatically with Clipto
- Add subtitles to video with an online editor like VEED
- Add subtitles to video with Clipto Mac App for private local files
- Add subtitles to video manually
- Hire a freelancer on Fiverr to add subtitles to video
Your Attractive Heading
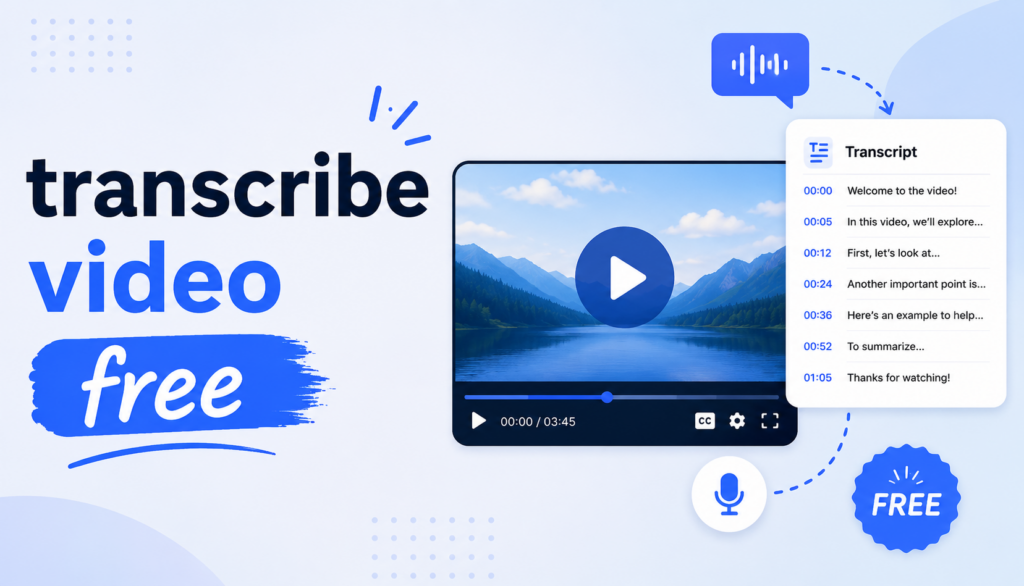
If you want to add subtitles to video fast without typing every spoken line yourself, Clipto is a strong place to start. An AI workflow usually saves the most time, especially when you work with interviews, classes, meetings, YouTube videos, podcast videos, or any longer recording that would take too long to caption by hand.
Step by step with Clipto
Step 1: Open Clipto, then upload your video file from your device or paste an online media link to get started. This gives you a simple way to work with both local files and videos that already live online.

Step 2: Review the text and make quick edits for accuracy. Fix names, numbers, product terms, or any line that needs cleaner wording. You can also check the timing and adjust any subtitle that does not match the video well.
Step 3: Use the extra tools when they help your workflow. Open Translate if you want subtitles in another language.
Check AI Summary if you want a quick overview before you edit.

Use AI Chat to pull key quotes, find important moments, or answer simple questions about the video without scrolling through the full transcript yourself.

Step 5: Export your subtitles in the format that fits your next step, such as SRT or VTT. Once you export the file, you can upload it to a platform, attach it to your video, or keep editing in your usual workflow.
Clipto works well because it cuts down the slowest part of subtitle work, which is typing and timing everything by hand. It helps even more when you work with long videos or real conversations, where people interrupt each other, switch topics fast, or use names and terms you need to clean up later. You still stay in control, but you start with a usable draft instead of a blank page. That makes the whole job faster, easier to review, and easier to move into the next stage of editing. If you want a browser based editor with more on screen editing controls, an online editor like VEED may feel more familiar.
Add Subtitles to Video with an Online Editor
If you want to stay in your browser and edit subtitles inside a visual workspace, VEED is a solid option. It feels more like an online video editor with subtitle tools built in, so you can add captions, adjust the text on screen, and make simple style changes in the same project. It also gives you a few ways to start: you can auto generate subtitles, type them manually, or upload an existing subtitle file.
Step by step with VEED
Step 1: Open VEED, create a project, and upload your video. This setup works well when you want to handle everything in one browser tab instead of moving between a caption tool and a separate editor.
Step 2: Go to the Subtitles tab and choose how you want to work. If you want speed, pick Auto Subtitle and select the spoken language. If you already have captions, upload an SRT or VTT file. If you want full control from the start, type the subtitles yourself. That flexibility makes VEED useful for people who do not all work the same way.
Step 3: Review the subtitle text inside the editor and clean it up. You can click into the lines, fix wording, and make the captions easier to read. If the timing feels off, you can adjust subtitle placement on the timeline, edit timecodes, and sync lines more closely to the speech. This part matters because auto captions save time, but they still work best when you give them a quick human pass.
Step 4: Style the subtitles so they fit the video better. VEED lets you change things like font, size, color, background, alignment, spacing, and animation. You can even use highlights and dynamic subtitle effects if you want the captions to feel more designed and more visible on screen. This is one reason people like browser based editors: you can see the text and the video together while you make visual decisions.
Step 5: Export the result in the format that matches your next step. You can render the video with subtitles burned in, or download subtitle files such as SRT, VTT, or TXT if you want to use them somewhere else. That gives you room to either finish inside VEED or move the captions into another workflow later.
VEED works well when you want a browser based editing flow and you like seeing subtitles as part of the full video canvas. It is easy to understand, and it makes sense when you want to edit captions, add text, and make light visual changes in one place. The tradeoff is that it leans more toward editor logic. If your main goal is to move fast through transcript, search, review, and export, some people may prefer a tool that focuses more directly on that workflow. If your main concern is privacy or local files on your Mac, a desktop workflow may feel like a better fit.
Add Subtitles to Video with Clipto Mac App for Private Files on Your Mac
If you work with private recordings, a Mac app can feel more comfortable than doing everything in a browser. Clipto’s Mac app makes sense when you want to keep local files organized, work from your desktop, and turn spoken content into subtitles without building your whole workflow around browser tabs.
Step by step with Clipto Mac App
Step 1: Open the Clipto Mac app and add your file to the library. You can drag a local video into the library area, use the import box if you have a link, or start a live recording if that works better for your setup. This gives you a simple place to manage private files without bouncing between tools.

Step 2: Wait for Clipto to process the file. Once it finishes, you will see the file in your library with a clear status, so you can open it and move straight into review.

Step 3: Open the file and start shaping the text into something you can actually use. Turn on Timestamp when you want to jump to exact moments in the recording. Use Speaker labels to separate different voices more clearly. Open Translate if you need subtitles in another language. Check AI Summary if you want a quick overview before you edit. Use AI Chat when you want to pull action items, key quotes, or important moments without reading the whole transcript line by line.
Step 4: Export the file in the format that matches your next step. If you want subtitle files, choose SRT or VTT. If you want a text version for notes or cleanup, choose DOCX or TXT. If you plan to keep editing in post production software, export to Premiere XML or Final Cut Pro FCPXML. That gives you more flexibility than a tool that only handles one output.
This method helps when privacy matters, when your files already live on your Mac, or when you want one place to review, search, organize, and export your work. It also does more than help you add subtitles to video. You can reuse the transcript for notes, summaries, quotes, or follow up content, which makes the file more useful after the subtitles are done. Of course, some people still prefer to type and control everything by hand.
Add Subtitles to Video Manually
If you care about every word, manual subtitles still have a place. This method takes the most time, but it gives you the most control. It works best for short videos, brand pieces, polished interviews, or anything that needs careful wording and clean timing.
Step by Step with Manual Subtitles
Step 1: Open your video in a player or editing tool where you can pause, rewind, and move through the timeline easily. A simple setup matters here, because you will stop and replay a lot.
Step 2: Start typing the spoken lines into a document or subtitle editor as you listen. Keep each line short and readable. If a sentence runs too long, break it where the speaker naturally pauses instead of cramming everything into one subtitle.
Step 3: Add timestamps line by line. This part takes patience, but it makes the biggest difference. You need each subtitle to appear at the right moment and stay on screen long enough to read without lagging behind the voice.
Step 4: Go back through the subtitles and clean them up. Fix spelling, punctuation, and names. Tighten any awkward lines. Check the line breaks too, because even accurate subtitles can look messy if they split in the wrong place.
Step 5: Save or export the subtitle file in the format you need. If you plan to upload the subtitles to a platform later, formats like SRT or VTT usually make the most sense.
Manual subtitle work gives you the most control, which is why people still use it for short, high stakes videos. You can shape every line, fine tune the timing, and make sure the wording matches the tone of the video exactly. The downside is obvious: it takes a lot of time, and that cost goes up fast once the video gets longer. For a quick social clip or a final cleanup pass, manual work still makes sense. For long interviews, meetings, or classes, it usually turns into a grind. If you do not want to spend that time yourself, hiring a freelancer can be the simpler option.
Hire a Freelancer on Fiverr to Add Subtitles to Video
If you do not want to spend your own time making subtitles, paying someone else to handle it can be the easiest path. This option makes sense when you are busy, when you have a batch of videos to get through, or when you just want the work off your plate.
Step by Step on Fiverr
Step 1: Go to Fiverr and search for freelancers who offer subtitle or caption services. Use simple terms like “video subtitles,” “captions,” or “SRT subtitles” so you can see a range of sellers and styles.
Step 2: Compare a few options before you choose one. Look at pricing, reviews, delivery time, and sample work. A cheap gig may look good at first, but if the subtitles read awkwardly or the timing feels sloppy, you will end up fixing the work yourself.
Step 3: Send the freelancer your video and explain exactly what you need. Tell them the language, the subtitle format, and whether you want burned in subtitles or a separate file like SRT or VTT. If spelling matters for names, product terms, or brand language, share that up front instead of waiting until the end.
Step 4: Review the finished subtitles carefully once they arrive. Check the wording, timing, punctuation, and line breaks. If anything looks off, ask for revisions while the project is still open.
This route can save a lot of time, especially for one off projects or content batches you do not want to handle yourself. At the same time, results can vary a lot from one freelancer to another. You also need to give clear instructions on language, file format, timing, and delivery standards, or you may get something that does not fit your workflow. Fiverr can work well for smaller jobs, but for repeat projects, it may not feel as smooth or consistent as doing the work inside your own tool setup. For some people, paying a freelancer makes perfect sense. For others, a tool based workflow is faster, cheaper, and easier to repeat.
Which Method Is Best for You
The best way to add subtitles to video depends on how you like to work. Some people want the fastest option. Some want more editing control. Others care more about privacy or simply do not want to do the work themselves. This quick comparison makes it easier to choose the method that fits your workflow.
| If you need… | Best method | Why it fits |
| The fastest way to get subtitles done | Clipto | It helps you move from upload to subtitle ready text quickly, which makes it a strong choice for interviews, meetings, classes, and longer videos. |
| A browser based editing workspace | VEED | It works well if you want to edit subtitles, adjust on screen text, and make simple visual changes in one place. |
| A better setup for private local files | Clipto Mac App | It makes more sense when your files stay on your Mac and you do not want your whole workflow to depend on a browser tab. |
| Full control over every word and line break | Manual subtitles | It takes the most time, but it gives you the cleanest control over wording, timing, and tone. |
| To hand the work off to someone else | Fiverr | It can save time when you are busy or working through a batch of videos, as long as you review the final result carefully. |
Tips to Make Video Subtitles Look Better
Even if you choose the right tool, subtitles can still look awkward if the text feels too long, the timing feels off, or the lines break in the wrong place. A few small fixes can make subtitles look much cleaner and much easier to follow.
- Keep subtitle lines short: Long subtitle blocks feel heavy and harder to read, especially on phones. Shorter lines look cleaner and give people a better chance to keep up with the video.
- Break lines where people would naturally pause: Do not split a sentence in a strange place just to make it fit. Try to break subtitles where the speaker would naturally stop, breathe, or shift to the next idea.
- Check names, brand terms, and numbers carefully: Subtitle tools often miss product names, people’s names, dates, prices, and technical terms. These small details stand out fast when they are wrong, so they deserve a second look.
- Match the timing to the way people actually speak: Subtitles should appear when the words are spoken and disappear at a pace that feels natural. If the text shows up too early, stays too long, or lags behind the voice, the whole video feels off.
- Watch the video once with the sound off: This is one of the easiest ways to catch weak subtitles. If you can follow the video clearly without hearing the audio, your subtitles are probably doing their job.
Conclusion
There is no single best way to add subtitles to video, because the right choice depends on what matters most in your workflow. If you want speed, a tool that can quickly transcribe audio to text and turn it into subtitle ready lines will usually make the job much easier. If you work with private files and want to keep everything on your own device, a Mac app makes more sense. If you care about every word, every pause, and every line break, manual editing still gives you the most control. And if you do not want to spend your own time on subtitle work at all, hiring a freelancer can be the simplest path. In the end, the best method comes down to speed, privacy, budget, and control. If you want a practical balance of speed and flexibility, Clipto is a solid place to start!
Frequently Asked Questions
What video and subtitle file formats should I use?
If you want to add subtitles to video online, start with a common video format like MP4 or MOV. For subtitle files, SRT is usually the safest choice because most platforms accept it. VTT also works well, especially for web video. If you only need plain text for review or cleanup, TXT can still be useful before you export the final subtitle file.
Can I paste a link instead of uploading a file?
Yes, in many cases you can. Some tools that add subtitles to video automatically let you paste a media link instead of uploading a local file, which is handy for videos hosted on YouTube, Google Drive, Vimeo, TikTok, or Dropbox. If the link import does not work smoothly, downloading the file and uploading it directly usually gives you fewer problems.
Can I translate and add subtitles to video free?
Yes, you usually can translate and add subtitles to video free for testing, short clips, or trial use. The more important question is whether the translated subtitles still read naturally. After translation, check names, brand terms, slang, and timing before you publish. That quick review matters because even good subtitle tools can miss context in fast speech or casual dialogue.
Can I edit subtitles after they are generated?
Yes, and you should. Even if you add subtitles to video automatically, the first draft still needs a quick cleanup. Fix names, numbers, punctuation, line breaks, and any subtitle that feels too long or too early. A small editing pass usually makes the final result look much more polished and much easier to read on screen.
What should I look for in the best app to add subtitles to video free?
When you compare tools, do not just look at price. The best app to add subtitles to video free should support common video formats, let you edit the text easily, export SRT or VTT, and handle translation if you need it. If privacy matters, look for a workflow that also works well with local files instead of forcing everything through a browser.