Record a Zoom meeting includes capturing all of the audio, video and shared content from an online meeting for review, sharing and future use. Meetings are no longer simply conversations; they are the source of information, ideas, and decisions in the remote world today. These are all scenarios where it’s essential to know how to record a Zoom meeting, so that nothing is lost. The recordings can be used to review the content, to clarify any misunderstandings and to ensure that all the content is captured.
The value of the record is so much more than storage. A recorded meeting converts to a resource that can be translated into a transcript, summary and actionable insight. This is a very handy tool for lengthy conversations, or conversations that are quite long and complicated, and you may not remember all the important points in hours of talking. This guide covers not only how to record a Zoom meeting on various devices, but also how to manage permissions, troubleshoot, and keep your meetings productive. More significantly, we will discuss the application of today’s AI tools to transform the raw recording into a usable, useful piece of knowledge that will save time and increase productivity!

Part 1. What You Need Before Recording a Zoom Meeting
Before you start, there are a few important things to check to ensure a smooth recording process and avoid common issues.
Permission matters
Only the host can record by default. If you’re not the host, you must request permission to record a zoom meeting as a participant. Without proper access, the record button will not appear. Hosts can also assign recording rights during the meeting.
Enable recording settings
Make sure recording is enabled in your Zoom account. Go to Settings, Recording and turn it on. If this option is disabled, even hosts won’t be able to record.
Choose recording type
- Local recording → saved directly on your computer, easy to access
- Cloud recording → stored online, ideal for sharing and mobile use
Recording is just the first step. To truly make use of your meeting content, you’ll also need tools for how to transcribe Zoom meetings and turn recordings into structured insights.
Part 2. How to Record a Zoom Meeting as Host
If you are the host, you can record the meeting directly and have full control over recording settings, permissions and storage options.
Step 1. Adjust Recording Settings Before Starting the Meeting
Before you start recording, open Zoom Settings and select Recording from the left menu.
Here, you can choose where recordings are stored, enable speaker names, add timestamps, and customize other recording preferences. Configuring these settings in advance helps ensure your recordings are saved exactly the way you need.

Step 2. Start a Zoom Meeting and Begin Recording
After starting your meeting as the host, click More (•••) in the toolbar and select Record. Zoom will begin recording the meeting automatically and display a recording indicator at the top of the screen.

Step 3. Access Your Zoom Recording After the Meeting
After the meeting ends, Zoom will automatically convert the recording and open the folder where the files are saved. You can find the recorded video (MP4), audio file, and recording configuration file in the folder for playback, sharing, or editing.

Part 2. How to Record a Zoom Meeting as a Participant or Without Permission
By default, Zoom requires participants to obtain recording permission from the host. If you don’t have permission, you won’t be able to use Zoom’s native recording feature.
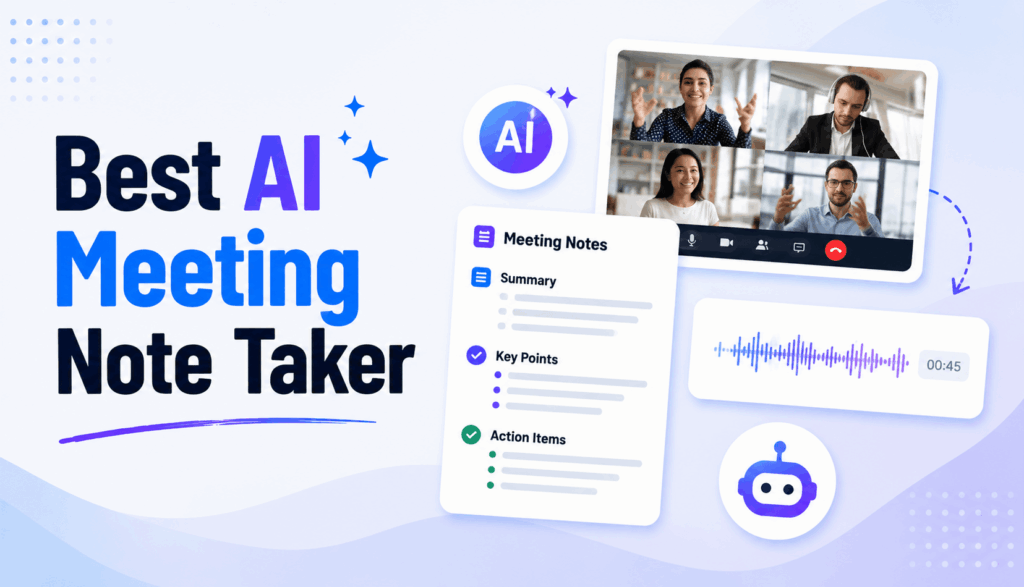
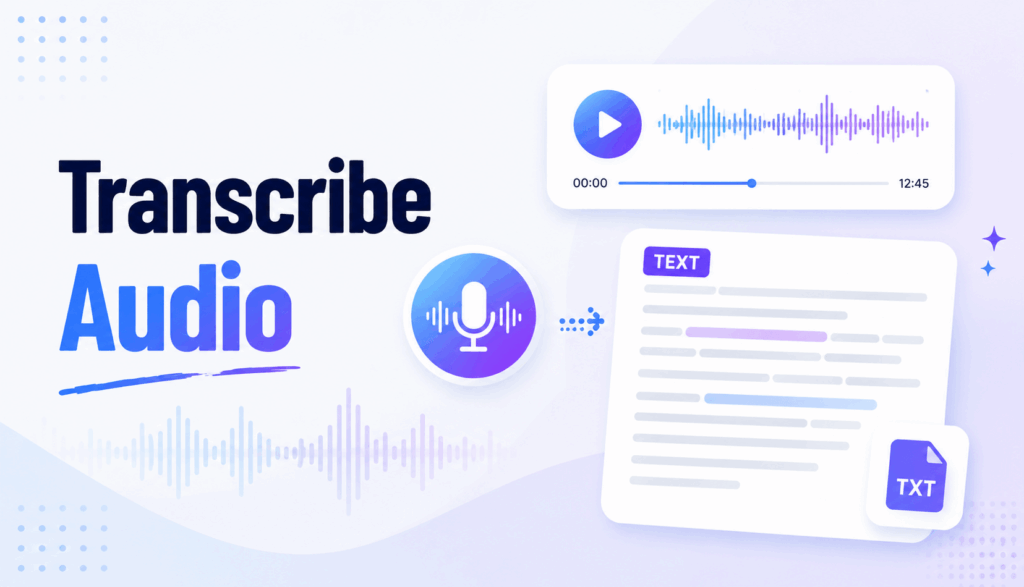
Fortunately, you can still capture and transcribe meeting content using a screen recorder or an AI meeting transcription tool. One of the easiest solutions is Clipto.AI, which allows you to record and transcribe Zoom meetings without host permission. Simply start recording before joining the meeting and Clipto.AI will generate real-time transcripts automatically. Once the meeting ends, you’ll receive a complete transcript, AI-powered meeting summary, speaker-based notes, timestamps, and other key insights.
Step 1. Start Recording a Zoom Meeting on a Web Browser Without Permission
Open Clipto.AI before joining the Zoom meeting and click Start Recording. Clipto.AI will capture meeting audio directly from your browser and generate real-time transcripts automatically, allowing you to record and transcribe Zoom meetings without host permission.

Step 2. View the Full Transcript After the Meeting
Once the meeting ends, Clipto.AI automatically generates a complete transcript with speaker identification and timestamps. You can also create AI-powered meeting summaries, extract key points and action items, translate transcripts into other languages, and use AI Chat to instantly find important information.

Step 3. Save and Export Meeting Records
Review your meeting transcript, summary, and AI-generated notes, then save or export them for future reference. This makes it easy to share meeting records, track decisions, and keep important discussions organized.

Note:
Unlike traditional screen recorders, Clipto.AI does more than just capture your meeting. It automatically generates meeting summaries, key points, action items, speaker-based notes and searchable transcripts. You can also use AI Chat to ask questions about the meeting and instantly find specific information. This saves you from rewatching lengthy recordings or manually creating meeting notes after the meeting.
Conclusion
It is also significant to know how to record a Zoom meeting but afterward the true value is achieved. Recording your meetings and using AI tools can help you comprehend meetings more rapidly, extract the main insights, and act promptly when you need to. You do not save talks, but make them decisions.
Recording is just a starting point of the current workflow. Transcription and summarization will make each meeting an organized knowledge and action plan. It is a time-saving effort and contribution to making each Zoom meeting more productive and meaningful, as well as making you work smarter.
FAQs
1. How can I convert a recording on Zoom to notes about the meeting?
The most efficient one is to apply AI tools that integrate transcription and summarization into a single workflow. These applications are able to rapidly transcribe audio to text, focus on essentials and identify action points automatically. To illustrate, apps such as Clipto.AI assist in automating the process of how to transcribe zoom meetings and creating structured summaries, which is much easier to convert raw tapes into easy to understand explanatory notes to take action on the meeting.
2. Does Zoom support automatic meeting transcription?
Yes, Zoom provides simple transcription services, particularly, cloud recordings. Nevertheless, the accuracy, formatting and structure can be compromised particularly when it comes to long or complex meetings. Artificial intelligence is more desirable to many users due to its superior performance in terms of the quality of transcripts and summaries and other more sophisticated capabilities such as key points or action items extraction, especially when looking for the best ai meeting note taker.
3. What is the time taken to process a Zoom recording?
The time to process is determined by the duration of the meeting and your device/internet performance. Short recordings can be converted within a few minutes, but longer recordings (in particular longer than an hour) can be much more time-consuming to convert and store. Cloud recordings also could require more time based on server load.
4. Should it seek to record Zoom meetings locally or in the cloud?
Local recording is more convenient when it is necessary to access a large number of files quickly, use them offline and be able to control the files in their entirety. Cloud recording on the other hand is best in sharing, remote access as well as team work, particularly among teams. The option of your workflow and preference to convenience or flexibility is the best option.